by Sylvain Artois on May 23, 2025
Like many of us, I have little time to post on social networks. Yet documenting the blooming dates of my garden work on Bluesky, sharing my plant choices, and meeting other gardeners is a project that really appeals to me. What I love is taking my daily walks and capturing those fleeting shots, and I also enjoy editing my posts and interacting on social media.
Between these two activities, there’s a whole “networking” process that drives me crazy and blocks my ability to post. So I decided to launch a side project and take the opportunity to test the trendy tool n8n : automating my Bluesky post creation as much as possible.
I’ll break down my write-up into 2 parts, corresponding to the two n8n workflows I’ve set up.
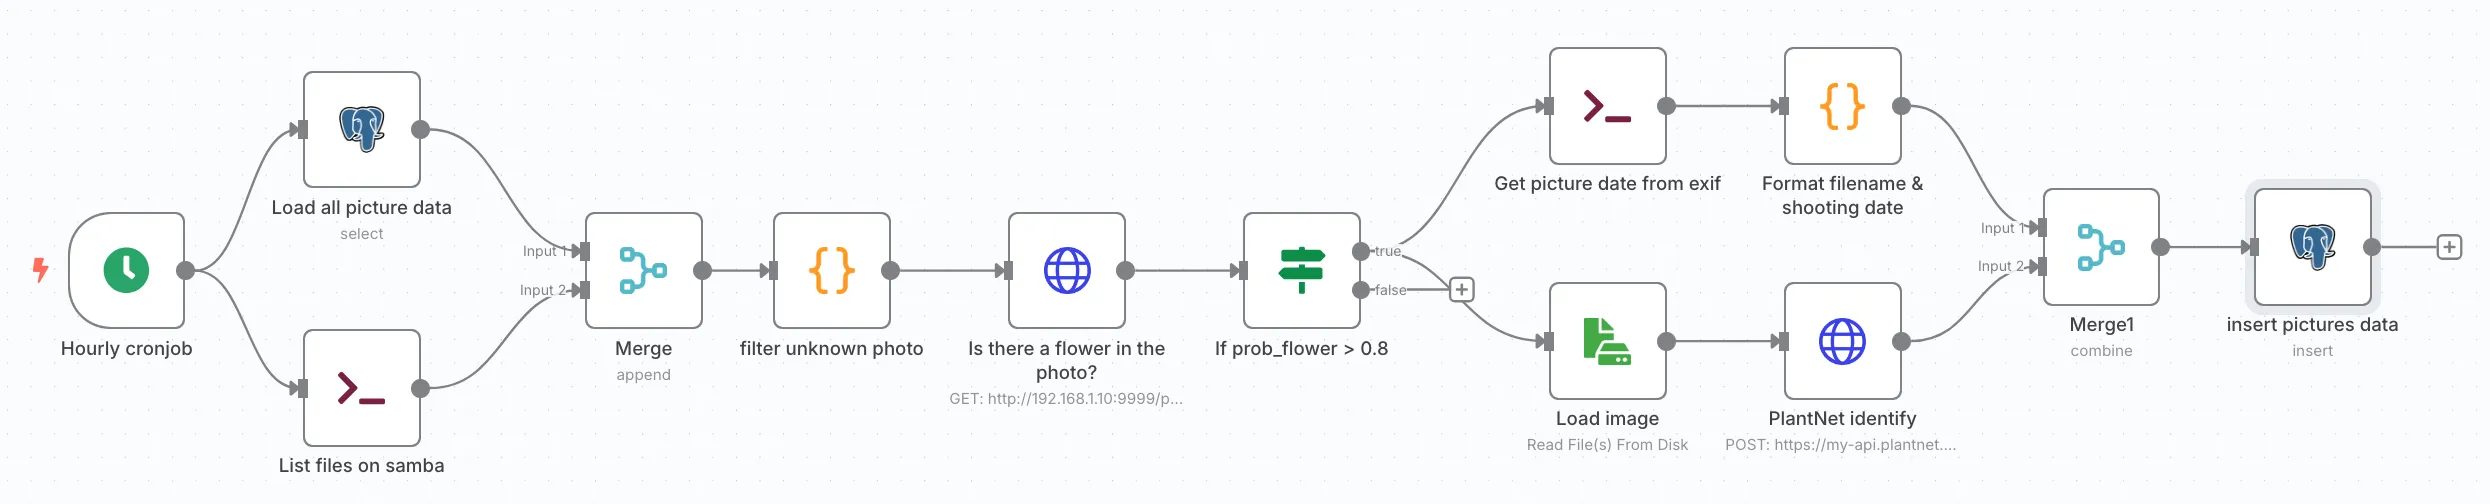
The first workflow consists of synchronizing photos from my phone to a Samba endpoint on my local network, developing a ML microservice that answers this simple question: does this photo contain a flower? If yes, we retrieve the EXIF shooting date and call the pl@ntnet API to identify the plant. If everything goes well, we save it to the database.
This creates a fairly linear, simple workflow - perfect for getting started.
I use the FolderSync app, which is free and very simple.
Here’s my config - nothing fancy, I simply share the Samba config screen. It took me a few minutes to figure out the right way to fill in these settings:

Every hour, the app triggers and pushes new photos, if any, to my endpoint.
I’m running n8n locally on the same server as my Samba. I did a standard setup with a simple Docker stack: n8n / postgres / pgadmin. Everything is pretty standard, except I had to extend the n8n Docker image to install exiftool, which I’ll use later.
I’m sharing the project sources on my GitLab.
One note though: n8n seems very simple and intuitive, and you think you understand it quickly. However, this simplicity actually hides real technical choices that guide development, and going against them makes your life complicated. For example, in my first experiments, I tended to use the Loop over items node when it was completely unnecessary. I can only recommend watching the 2 official documentation playlists: Beginner and Advanced, which objectively simplified my first naive workflows.

The goal of this first part is to identify photos we’ve never seen before.
We retrieve a list of photos on disk via an Execute Command node:
ls -1 /home/backup-s21-photosIn parallel, we load all entries from the picture_data table and assemble everything via a Merge node.
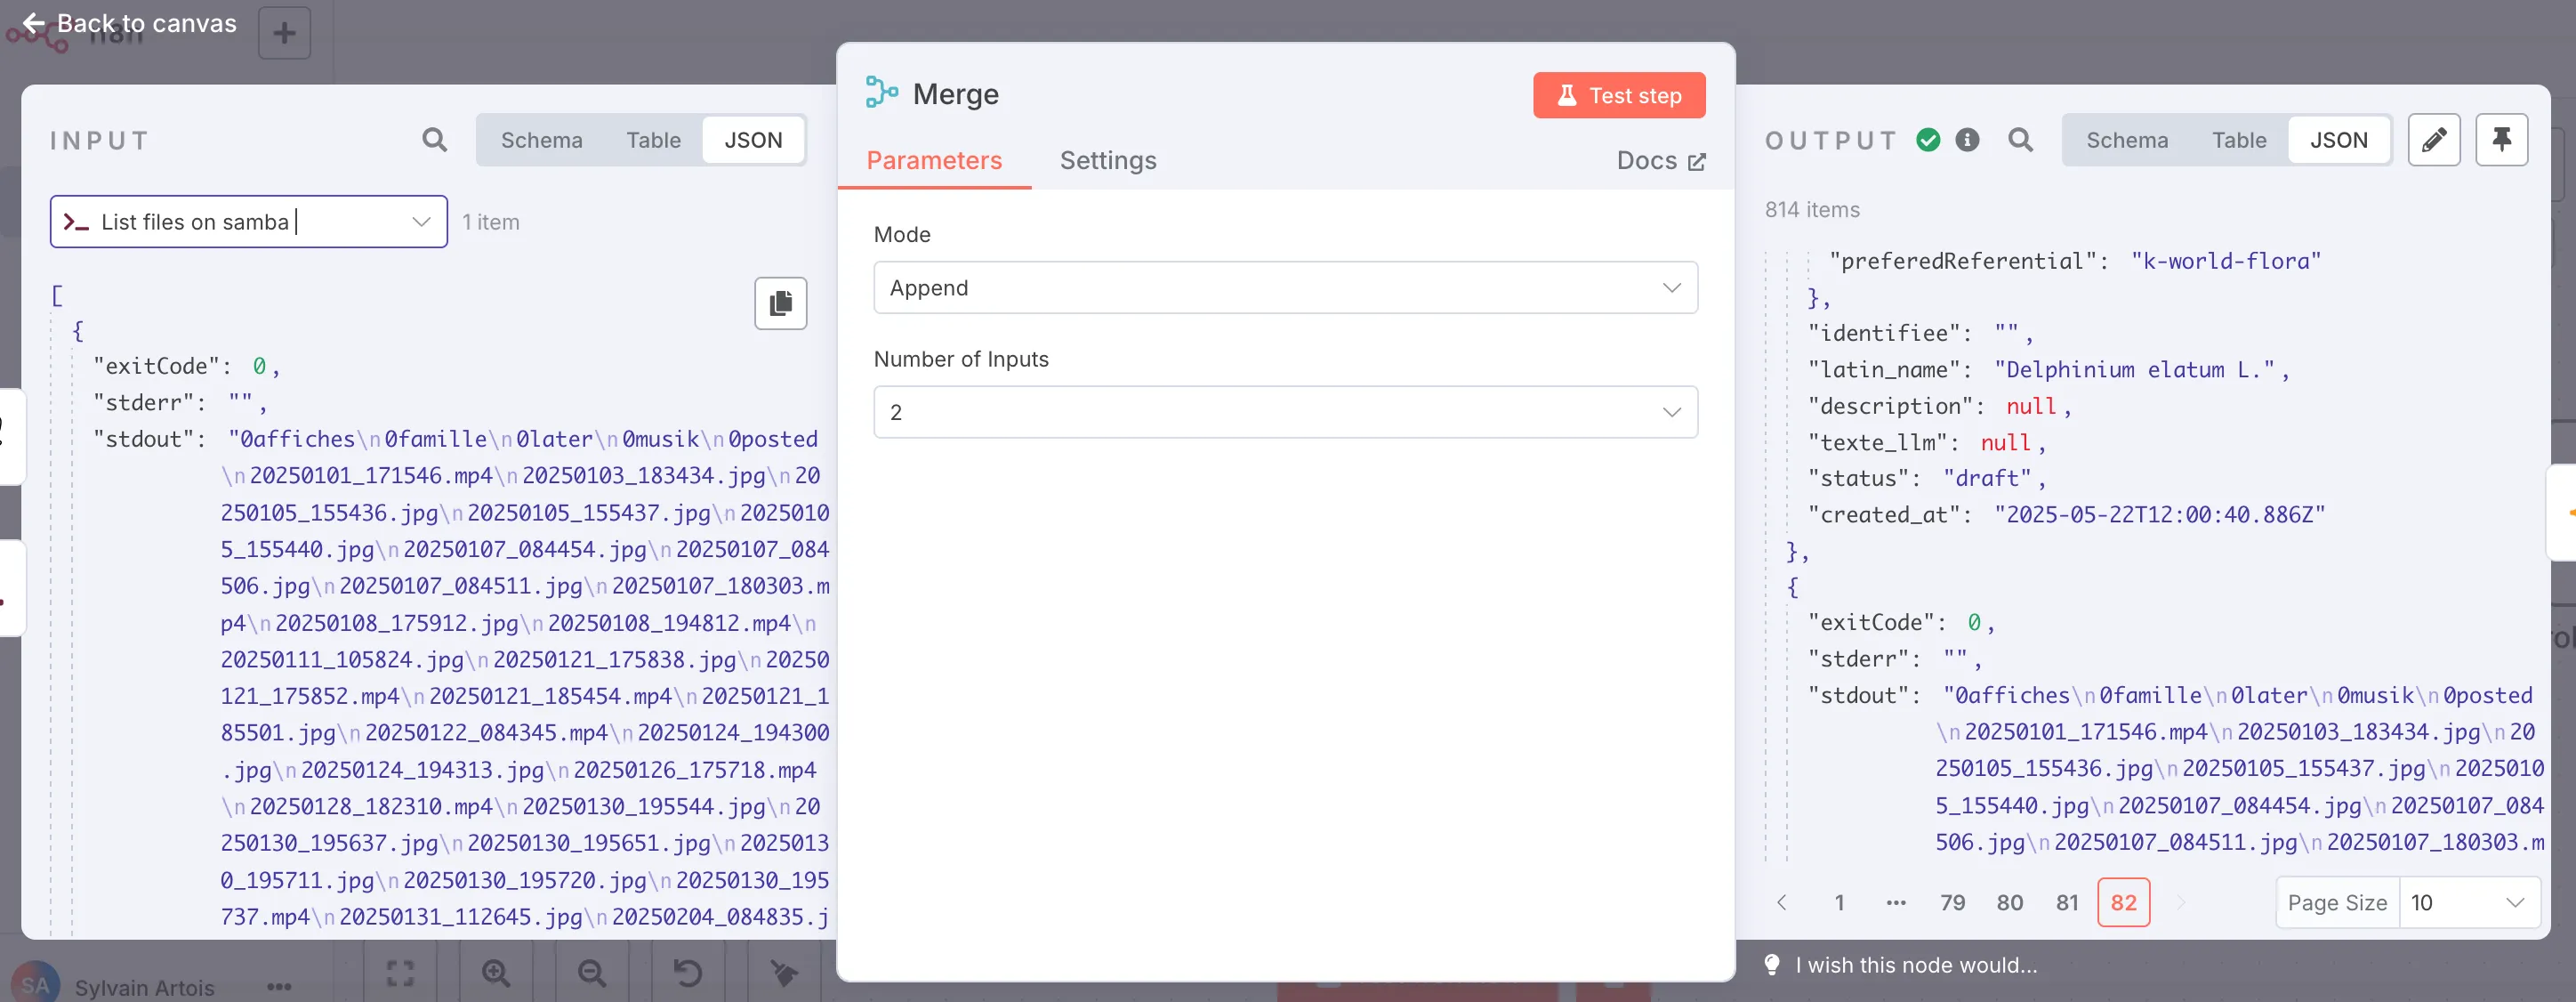
There are some important nodes in n8n’s mechanics that allow you to manipulate the data flow, and it’s essential to understand how they work. Here, we have an array that first contains items from the database (known images), and as the last element, the output of the ls -l command.
We can then add a Code node that will help us identify new photos:
const knownPictures =
  $("Load all picture data")
    .all()
    .map((row) => row.json.filename) ?? [];
const filesOnDisk = $input
  .last()
  .json.stdout.split("\n")
  .filter((name) => name.endsWith(".jpg"));
return filesOnDisk
  .filter((name) => !knownPictures.includes(name))
  .map((name) => ({ json: { filename: name } }));
The JavaScript execution environment is very controlled - you have to play around a bit to understand how to access the data. Here I use this expression, $('Load all picture data').all(), which lets me access all the Postgres data, and $input.last(), which contains the ls command output. Generally, you type $ and look at what the autocompletion suggests - it’s very playful and you understand quickly.
Next, we need to determine whether the photo contains a flower or not.
I was about to implement some kind of binary classifier, hacking the Birds vs Airplane example from chapter 7 of Deep Learning with PyTorch, which would have been a perfect exercise for the aspiring deep learner that I am. GPT was getting me excited by listing flower datasets (Oxford 102) and non-flower ones like ImageNet. But that would be a bit of a side-project within the side-project, moving away from the n8n getting-started goal…
While digging around, I stumbled upon the concept of zero-shot classification and found it revolutionary compared to the classic binary classifier described in Deep Learning books. I dug deeper and discovered OpenAI’s CLIP model, notably through this Pinecone article.
With just a few lines of Python, we can answer our question: flower or not?
model = CLIPModel.from_pretrained("openai/clip-vit-base-patch32")
processor = CLIPProcessor.from_pretrained("openai/clip-vit-base-patch32")

image = Image.open(image_path).convert("RGB")

texts = [ "a botanical macro photo of a flower", "a family photo or any photo without flowers"]
inputs = processor(text=texts, images=image, return_tensors="pt", padding=True)
outputs = model(**inputs)
probs = outputs.logits_per_image.softmax(dim=1).tolist()[0]
See on Hugging Face.
In the texts array, we have our two categories: “a botanical macro photo of a flower” or “a family photo or any photo without flowers”.
And it works almost perfectly!
I obviously get some false negatives:
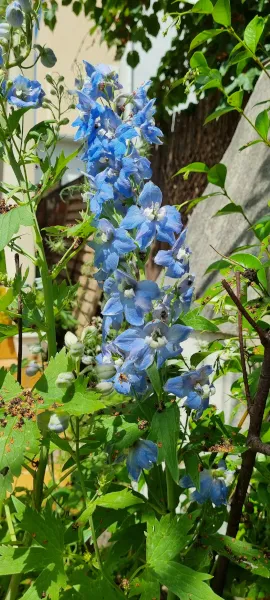
“prob_non_flower”: 0.9262
CLIP doesn’t like delphiniums …
Here the problem is probably the keyword macro - I’ll need to improve the prompt.
Add FastAPI, a small container, and you have a microservice ready for n8n!
The end of the workflow is simpler:
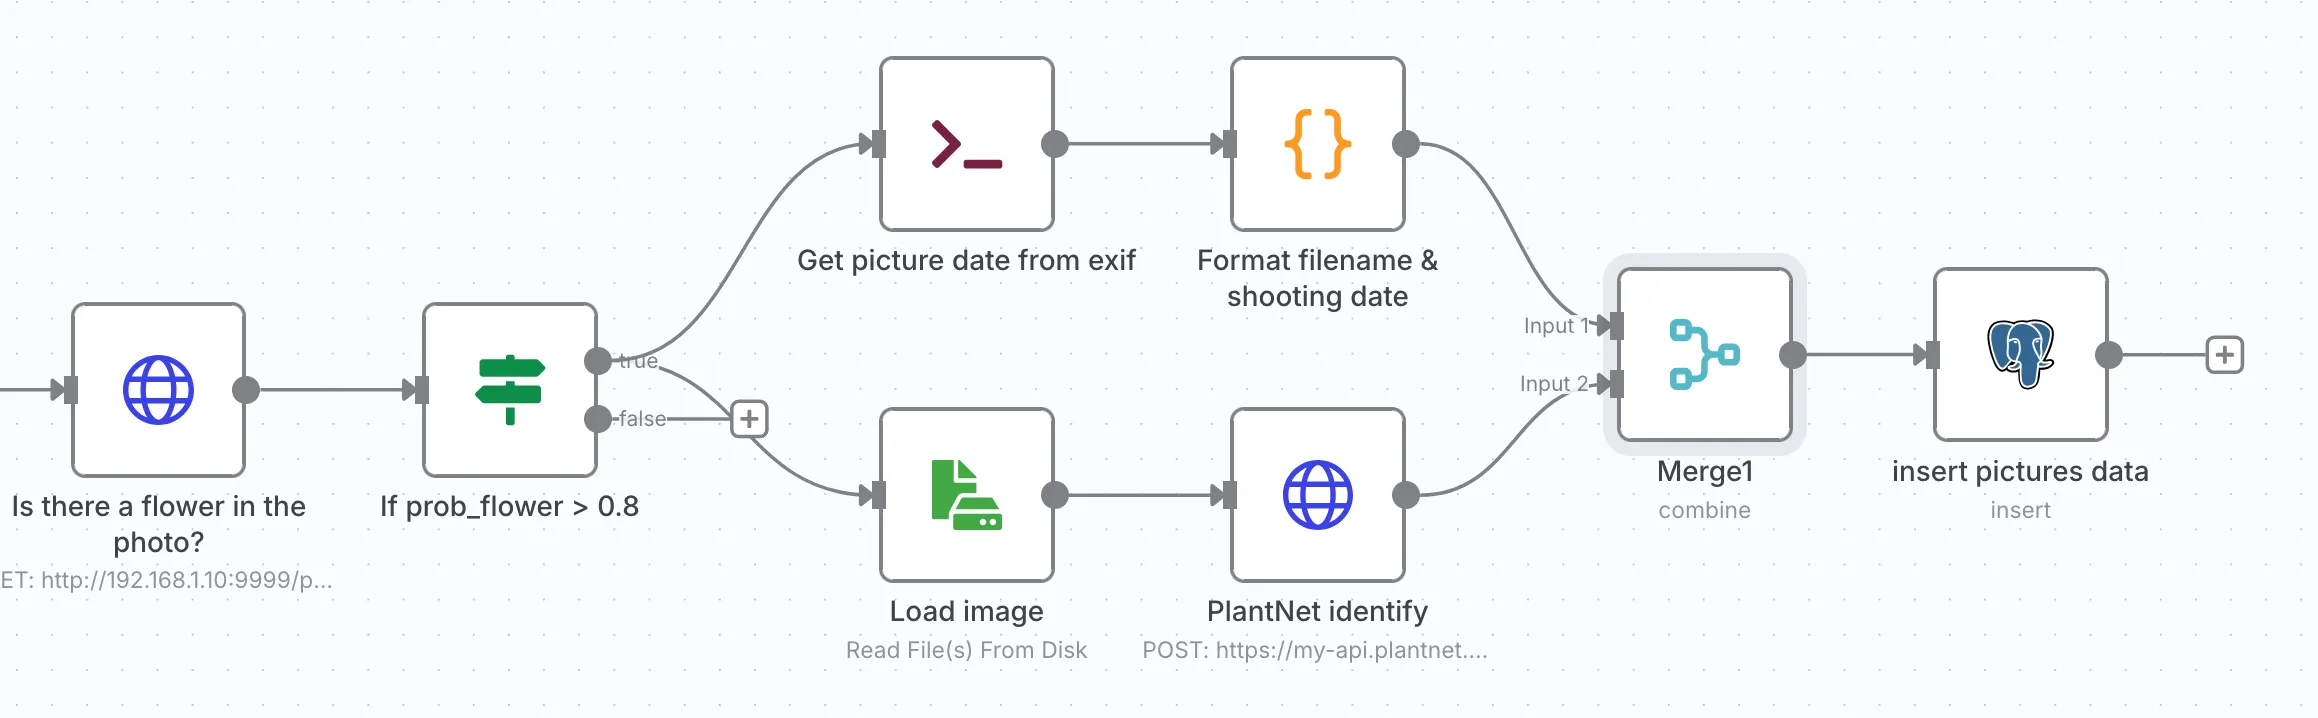
filename="{{ $json.filename }}"; exiftool_output=$(exiftool -DateTimeOriginal /home/backup-s21-photos/$filename); echo "$exiftool_output | $filename"This gives us:
{
  "exitCode": 0,
  "stderr": "",
  "stdout": "Date/Time Original : 2025:05:17 15:26:57 | 20250517_152657.jpg"
}
The attentive reader will note that the filename IS the shooting date. This is the case with my Samsung, but not with my Pentax - I prefer to be defensive.
The last merge node therefore consists of merging the two branches:

Here we use Combine mode, which tries to bring items together using a field that shares common data. Luckily, the Pl@ntNet API returns the uploaded file (in predictedOrgans), so this reconciliation is fairly simple. In the output, we activate Keep Everything to preserve all fields from both branches.
And there you have it - a small database insert, and we’ve identified the flowers in my garden.
I spent a few hours on this on a Saturday afternoon, watched the training playlist in the evening, and by Sunday morning it was done. I really loved playing with n8n. The magical aspect worries me a bit - I wonder how it scales, and especially how to debug when things break. But for now it’s super fluid and gives me lots of ideas.
In part 2, we’ll see a slightly more complex workflow, with some error handling, a call to the Mistral API, and using Cloudinary to improve photos.